
Checkout Quickstart
In this quickstart you will go from installation of SDKs to running a crypto payment transaction through the checkout widget running locally. For this example we will be installing two items:
- Circle's Node.js SDK (optional)
- Checkout Widget SDK
1. Get an API key
The Circle Payments API uses API keys as the mechanism to authenticate client requests. The API key must be set in the Authorization header of the request sent from your backend server. The format of the header is Bearer secret-key-value.
Learn more about authenticating API calls here.
To obtain an API key for the sandbox environment, simply create an account and generate a new key in settings - it only takes a few seconds.
Once you have generated your API key, record it in a secure place.
2. Local Setup
Circle Node.js SDK assist you in quickly getting your codebase up and running with Circle APIs.
Server side
The easiest way to add Circle’s Widget SDK is through NPM. You can run one of the two commands below from your project directory to install the SDK:
npm install @circle-fin/circle-widgets-sdk --save
# or
yarn add @circle-fin/circle-widgets-sdk
Initialize the API driver, providing your API key and environment. To create a sandbox account and acquire an API key please visit https://app-sandbox.circle.com.
const circle = new Circle(
   '<your-api-key>',
   CircleEnvironments.sandbox // API base url
);
If you are not interested in using Node.js SDK you can also integrate directly to our RESTful APIs. Throughout this quickstart we will provide instructions on how to use either or.
Client side
Circle Checkout Widget SDK is a client side Javascript SDK. You can install it through NPM by running the following command.
npm install @circle-fin/checkout-sdk --save
# or
yarn add @circle-fin/checkout-sdk
Additional dependencies for Create React App
Currently create-react-app (CRA) doesn’t build the checkout widget and its dependencies correctly due to CRA5 no longer having polyfills by default, this causes some of the SDK’s dependencies to break. To handle this please do the following:
- Add
react-app-rewired. This allows you to add more configuration values to the existingreact-scriptsthat CRA comes with by default.
npm install react-app-rewired --save-dev sed -i '' 's/react-scripts /react-app-rewired /g' package.json touch config-overrides.
The above lines simply install and save in the dev dependencies package. Then replace all instances of react-scripts with react-app-rewired within your package.json. Finally, it creates a config-overrides.js file as a place for us to override some webpack config values.
// Your scripts in package.json should now look like this
"scripts": {
    "start": "react-app-rewired start",
    "build": "react-app-rewired build",
    "test": "react-app-rewired test",
    "eject": "react-app-rewired eject"
  },
- Open up
config-overrides.jsand add the following:
module.exports = function override(webpackConfig) {
  webpackConfig.module.rules.push({
    test: /\\.mjs$/,
    include: /node_modules/,
    type: "javascript/auto",
  });

   webpackConfig.resolve.fallback = {
    http\: require.resolve("stream-http"),
    https\: require.resolve("https-browserify"),
    url: require.resolve("url"),
    crypto: require.resolve("crypto-browserify"),
    stream: require.resolve("stream-browserify"),
    ...webpackConfig.resolve.fallback,
  };
  return webpackConfig;
};
This code tells webpack how to properly build the SDK and its dependencies. It requires some installed libraries however, so go back into package.json and add the following packages to the dependencies list:
"stream-http": "^3.2.0",
"https-browserify": "^1.0.0",
"url": "^0.11.0",
"crypto": "npm:crypto-browserify",
"crypto-browserify": "^3.12.0",
"stream": "npm:stream-browserify",
"stream-browserify": "^3.0.0"
With these added the full dependencies list should look something like this:
"dependencies": {
    "@circle-fin/circle-widgets-sdk": "^1.0.0",
    "@testing-library/jest-dom": "^5.16.5",
    "@testing-library/react": "^13.4.0",
    "@testing-library/user-event": "^13.5.0",
    "react": "^18.2.0",
    "react-dom": "^18.2.0",
    "react-scripts": "5.0.1",
    "web-vitals": "^2.1.4",
    "stream-http": "^3.2.0",
    "https-browserify": "^1.0.0",
    "url": "^0.11.0",
    "crypto": "npm:crypto-browserify",
    "crypto-browserify": "^3.12.0",
    "stream": "npm:stream-browserify",
    "stream-browserify": "^3.0.0"
  },
The versions listed above are not a specific requirement, just what was used at the time of writing. Feel free to use different versions if you like.
- Save all these changed files and run a
npm install.
3. Create a Checkout Session
Once the customer has indicated they would like to checkout you will create checkout session from your server side app to acquire a clientToken and id.
async function createCheckoutSession() {
 const createCheckoutSessionRes =
   await circle.checkoutSessions.createCheckoutSession({
     successUrl: "https://www.example.com/success",
     amount: {
       amount: "3.14",
       currency: "USD",
     },
   });
}
curl --location --request POST 'https://api-sandbox.circle.com/v1/checkoutSessions' \
--header 'Authorization: Bearer ${YOUR_API_KEY}' \
--header 'Content-Type: application/json' \
--data-raw '{
 "successUrl": "https://www.example.com/success",
 "amount": {
   "amount": "3.14",
   "currency": "USD"
 }
}'
{
 "data": {
   "id": "3e4f4108-cbb4-4620-bd30-4bcf8c28ca20",
   "type": "checkout_session",
   "successUrl": "https://www.example.com/success",
   "clientToken": "ck_test_19NoQz3jDq3mKgJFEuMkWs4dCk6Eiq1GZShWMF_jY_vL3dOAoT3EiTTgEprqaVcGbzB3pszRZhyU_v0mebyKiQ",
   "status": "active",
   "createDate": "2022-07-21T20:13:35.578678Z",
   "updateDate": "2022-07-21T20:13:35.578678Z",
   "expiresOn": "2022-07-21T20:19:24.859052Z",
   "amount": {
     "amount": "3.14",
     "currency": "USD"
   },
   "amountPaid": {
     "amount": "2.20",
     "currency": "USD"
   },
   "paymentIds": [],
   "paymentIntentIds": []
 }
}
4. Create Circle Checkout
Use Circle's Widget SDK to create a checkout component on your app to show the available payment methods, and to collect payment from your consumers.
import Head from 'next/head'
import styles from '../styles/Home.module.css'
import { CircleCheckout } from '@circle-fin/circle-widgets-sdk'
import '@circle-fin/circle-widgets-sdk/lib/dist/base.css';
import '@circle-fin/circle-widgets-sdk/lib/dist/components.css';
import '@circle-fin/circle-widgets-sdk/lib/dist/fonts.css';

export default function Home() {
 return (
   <div className={styles.container}>
     <Head>
       <title>Create Next App</title>
       <meta name="description" content="Generated by create next app" />
       <link rel="icon" href="/favicon.ico" />
     </Head>

     <main className={styles.main}>
       <div style={{height: '800px', width: '800px'}}>
         <CircleCheckout
          sessionId="your_checkout_session_id"
          environment="sandbox"
          clientKey="your_client_token"
          onError={(error) => {}}
          onPaymentSuccess={(res) => {}}
         />
       </div>
     </main>
   </div>
 )
}
To customize the widget to match the design you pass in the options object. See SDK reference for more detail.
5. Payment Settlement
A notification in the structure below is sent on checkout session completion.
{
  "clientId": "28d8765b-9b82-406e-bfbb-6dfdff66279b",
  "notificationType": "checkoutSessions",
  "checkoutSession": {
    "id": "3e4f4108-cbb4-4620-bd30-4bcf8c28ca20",
    "type": "checkoutSession",
    "successUrl": "https://www.example.com/success",
    "clientToken": "ck_test_19NoQz3jDq3mKgJFEuMkWs4dCk6Eiq1GZShWMF_jY_vL3dOAoT3EiTTgEprqaVcGbzB3pszRZhyU_v0mebyKiQ",
    "status": "completed",
    "createDate": "2022-07-21T20:13:35.578678Z",
    "updateDate": "2022-07-21T20:13:35.578678Z",
    "expiresOn": "2022-07-21T20:19:24.859052Z",
    "amount": {
      "amount": "3.14",
      "currency": "USD"
    },
    "amountPaid": {
      "amount": "2.20",
      "currency": "USD"
    },
    "paymentIds": ["bd50dd30-9cce-4362-9cdb-de7411d0ab63"],
    "paymentIntentIds": ["27172ae1-2438-4d23-ba6c-01c9498dcd21"]
  }
}
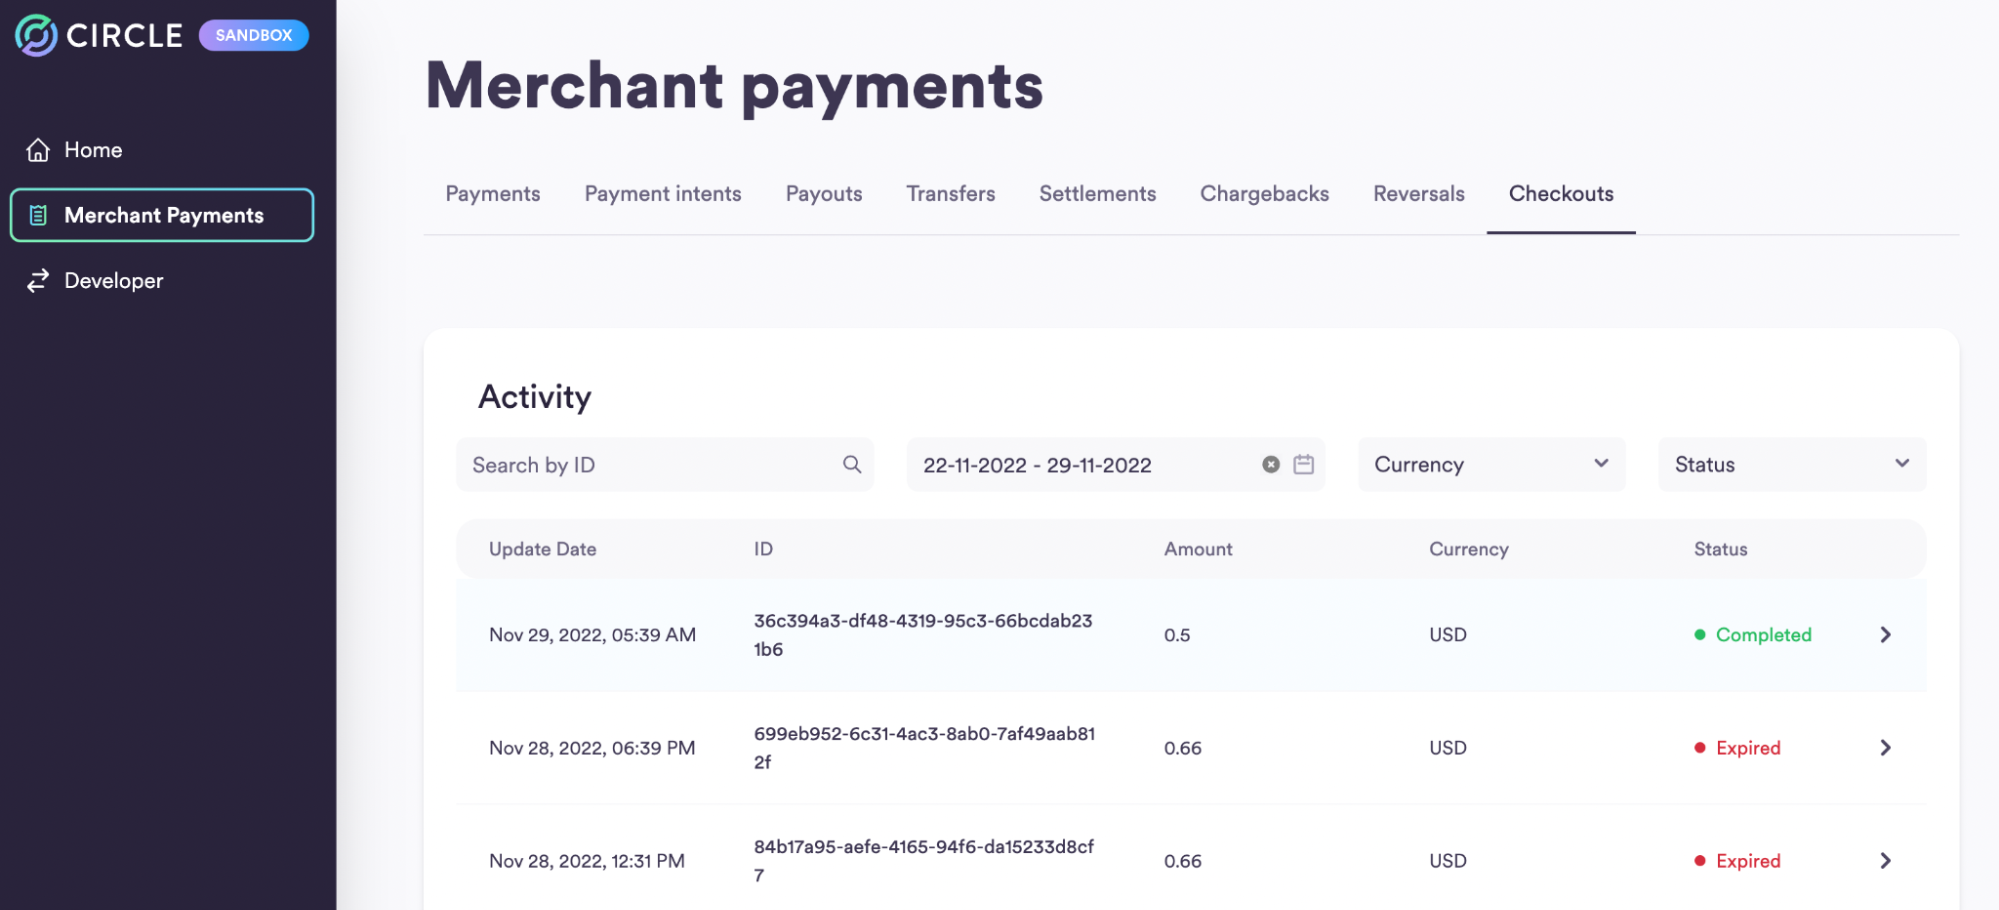
6. Merchant Dashboard
Also, you can use our merchant dashboard to check the status of checkout sessions.
7. Ready for the next step?
If you are in advanced stages of experimenting with our APIs and want to plan moving to production, please start by applying for a Circle Account and subsequently reach out to sales. We'll be happy to walk you through to the next steps.
We can't wait to see what you are going to build!
Updated about 1 year ago