Prerequisites
Before building the sample app for USDC transfer on Aptos, ensure you have the following:- Node.js and npm:
Ensure that you have
Node.jsandnpminstalled on your machine. You can download and installNode.jsfrom nodejs.org.npmcomes withNode.js. - Aptos Wallet:
Install the Aptos Wallet browser extension and set up your wallet. Ensure that
your wallet is funded with:
- Some Aptos testnet tokens to cover transaction fees. You can use the Aptos Faucet.
- USDC tokens for the transfer. (USDC Testnet Faucet)
Contract Addresses
You will need the following contract addresses:Installation
Perform the following installation and setup steps:- Create a new project directory and initialize it with
npm:
Shell
-
When prompted, choose the following options:
- Use
TypeScript: Yes - Use
ESLint: Yes - Use
Tailwind CSS: Yes - Use
src/directory: Yes - Use
App Router: Yes - Customize the default import alias: No
- Use
- Navigate to the project directory:
Shell
- Install additional dependencies:
Shell
Import Code and Setup
- Copy the following code into the
src/app/page.tsxfile. This section imports necessary libraries and sets up the network configuration.
TypeScript
TypeScript
TypeScript
useEffect() to update the connection status whenever the currentAccount
changes.
TypeScript
TypeScript
TypeScript
Main Application Component
This component wraps theHomeContent() function with the necessary providers
for state management and wallet connection.
TypeScript
- Start the development server:
Shell
- Open http://localhost:3000 in your browser.
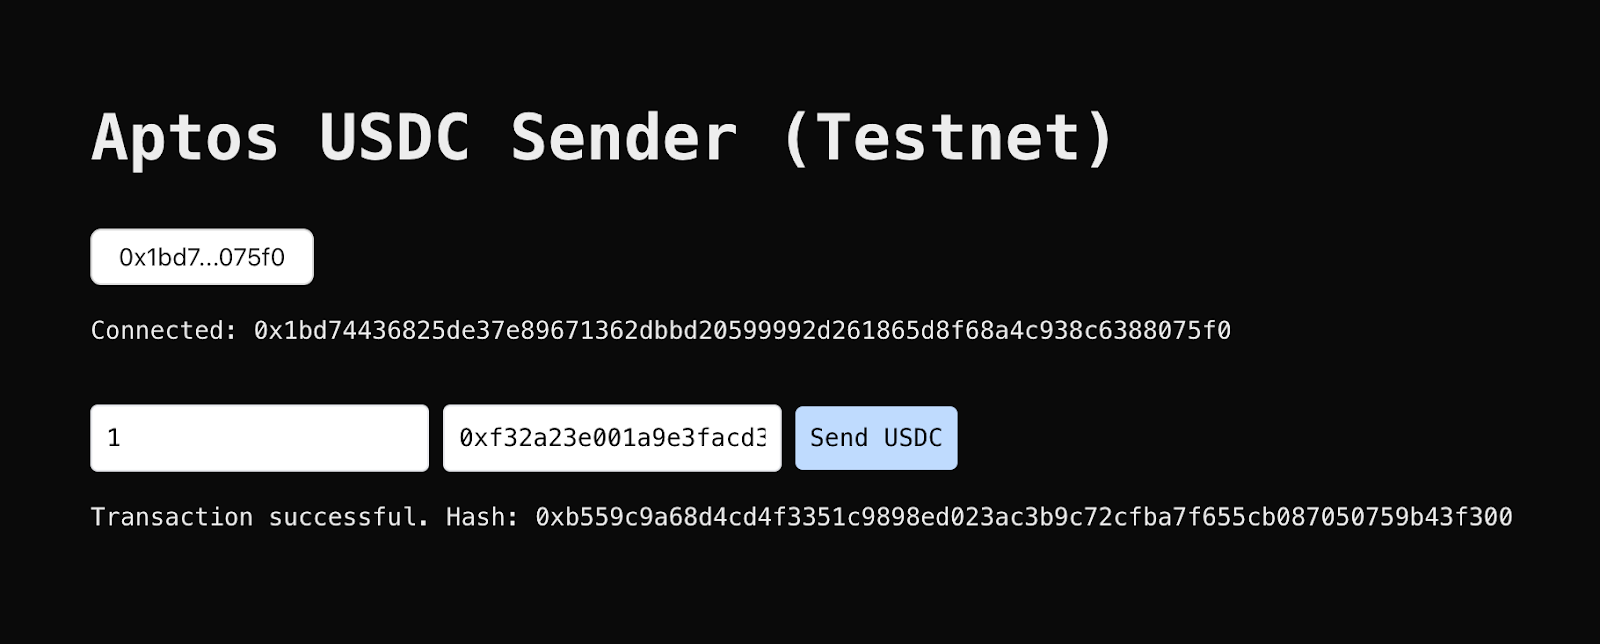
Connecting Your Wallet
- On the USDC Token Sender app, click the
Connect Walletbutton. - Select your wallet from the list of available options.
- Approve the connection in your wallet extension.
Performing a USDC Transfer
- Ensure you have USDC tokens in your wallet. You can get testnet tokens from Circle’s faucet if needed.
- Click on
Request testnet Aptos Tokensfrom your Aptos Wallet to source gas tokens. - In the app, enter the amount of USDC you want to send and the recipient’s address.
- Click the
Send Tokensbutton. - Your wallet will prompt you to approve the transaction. Review the details and confirm.
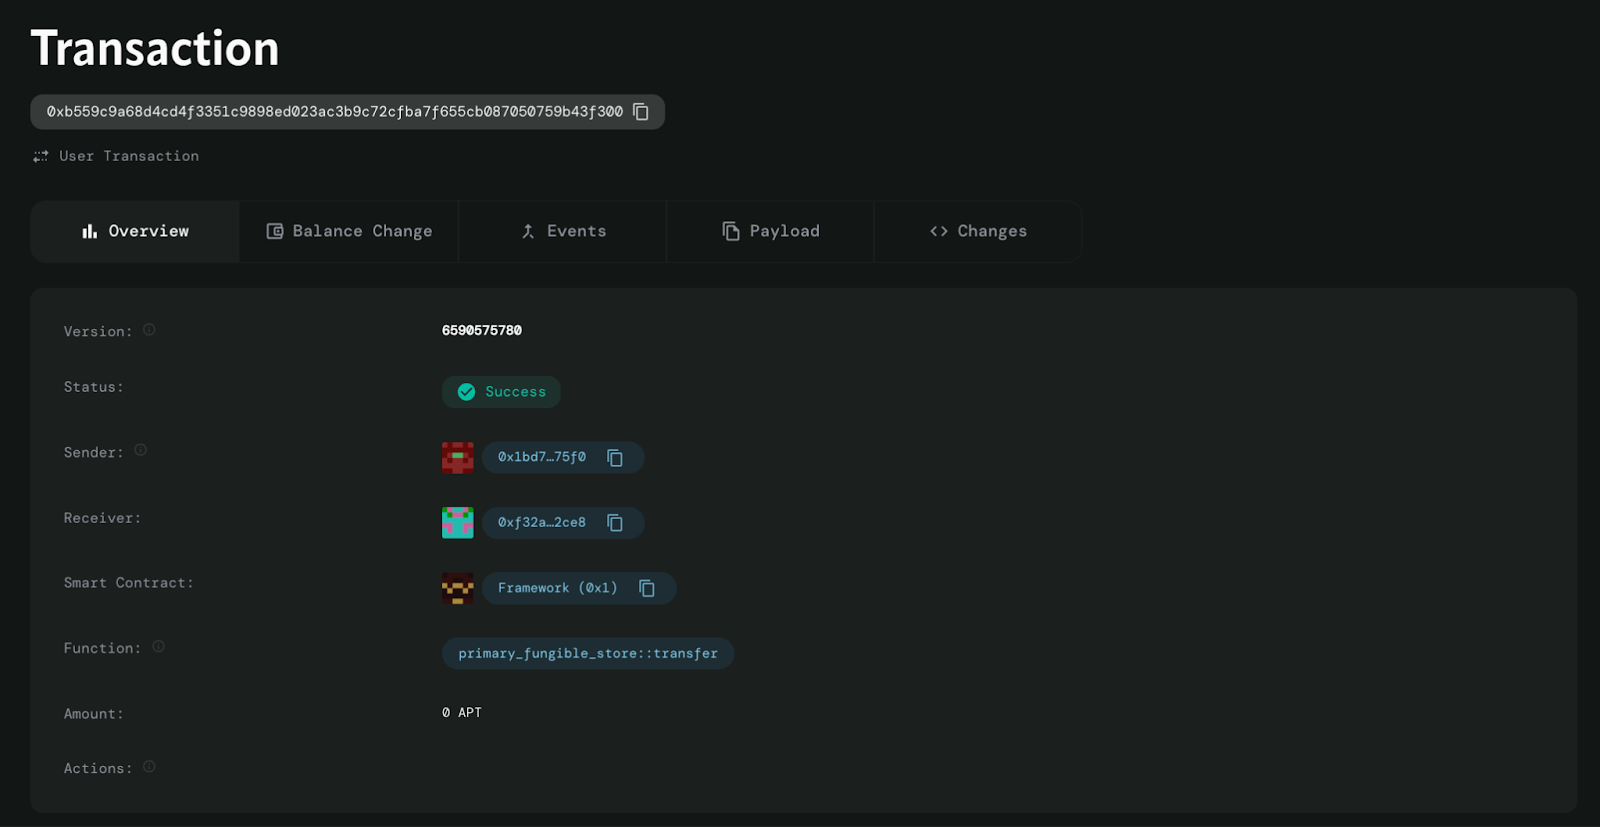
- Wait for the transaction to be processed. The app will display the transaction status.
Sample App UI
Successful Transaction
You can use the Aptos Explorer to check the status of the transaction.