> ## Documentation Index
> Fetch the complete documentation index at: https://developers.circle.com/llms.txt
> Use this file to discover all available pages before exploring further.

# Quickstart: Set up and transfer USDC on Aptos

USDC provides the ability to transfer digital dollars over public blockchains
using smart contracts. The USDC smart contract allows you to send, receive, and
store digital dollars onchain with a wallet. This quickstart guide provides
step-by-step instructions to build an app for performing your first USDC
transfer on Aptos.

## Prerequisites

Before building the sample app for USDC transfer on Aptos, ensure you have the
following:

* **[Node.js](https://nodejs.org/en)** and **[npm](https://www.npmjs.com/)**:
  Ensure that you have `Node.js` and `npm` installed on your machine. You can
  download and install `Node.js` from [nodejs.org](http://nodejs.org). `npm`
  comes with `Node.js`.
* **[Aptos Wallet](https://aptosfoundation.org/ecosystem/project/aptos-connect)**:
  Install the Aptos Wallet browser extension and set up your wallet. Ensure that
  your wallet is funded with:
  * Some Aptos testnet tokens to cover transaction fees. You can use the
    [Aptos Faucet](https://aptos.dev/en/network/faucet).
  * USDC tokens for the transfer.
    ([USDC Testnet Faucet](https://faucet.circle.com/))

## Contract Addresses

You will need the following contract addresses:

* Testnet USDC -
  [`0x69091fbab5f7d635ee7ac5098cf0c1efbe31d68fec0f2cd565e8d168daf52832`](https://explorer.aptoslabs.com/fungible_asset/0x69091fbab5f7d635ee7ac5098cf0c1efbe31d68fec0f2cd565e8d168daf52832?network=testnet)

## Installation

Perform the following installation and setup steps:

1. Create a new project directory and initialize it with `npm`:

```shell Shell theme={null}
npx create-next-app@latest usdc-transfer-app
```

2. When prompted, choose the following options:
   * Use `TypeScript`: Yes
   * Use `ESLint`: Yes
   * Use `Tailwind CSS`: Yes
   * Use `src/` directory: Yes
   * Use `App Router`: Yes
   * Customize the default import alias: No

3. Navigate to the project directory:

```shell Shell theme={null}
cd usdc-transfer-app
```

4. Install additional dependencies:

```shell Shell theme={null}
npm install @aptos-labs/ts-sdk @aptos-labs/wallet-adapter-ant-design @aptos-labs/wallet-adapter-react
```

## Import Code and Setup

5. Copy the following code into the `src/app/page.tsx` file. This section
   imports necessary libraries and sets up the network configuration.

```javascript TypeScript theme={null}
"use client";
import { useState, useEffect } from "react";
import { WalletSelector } from "@aptos-labs/wallet-adapter-ant-design";
import { AptosWalletAdapterProvider } from "@aptos-labs/wallet-adapter-react";
import { PetraWallet } from "petra-plugin-wallet-adapter";
import { Aptos, AptosConfig, Network } from "@aptos-labs/ts-sdk";
import { useWallet } from "@aptos-labs/wallet-adapter-react";

// Initialize Aptos client
const config = new AptosConfig({ network: Network.TESTNET });
const aptos = new Aptos(config);

// Configure wallets for testnet
const wallets = [new PetraWallet()];
```

This component handles the main functionality of the application, including
wallet connection token definition, and token transfer.

**a. Define USDC testnet token contract**

```javascript TypeScript theme={null}
// Aptos USDC contract address on testnet
const USDC_ADDRESS =
  "0x69091fbab5f7d635ee7ac5098cf0c1efbe31d68fec0f2cd565e8d168daf52832";
```

**b. State Management**

Define state variables to manage the connection status, amount, recipient
address, and transaction status.

```javascript TypeScript theme={null}
function HomeContent() {
  const [connected, setConnected] = useState(false);
  const [amount, setAmount] = useState('');
  const [recipientAddress, setRecipientAddress] = useState('');
  const [txStatus, setTxStatus] = useState('');
  const { account, signAndSubmitTransaction } = useWallet();
```

**c. Effect Hook for Connection Status**

Use `useEffect()` to update the connection status whenever the `currentAccount`
changes.

```javascript TypeScript theme={null}
// Update the connection status when the current account changes
useEffect(() => {
  setConnected(!!account?.address);
}, [account]);
```

**d. Token Sending Logic**

Define the function to handle sending tokens, including validation and
transaction execution.

```javascript TypeScript theme={null}
const handleSendTokens = async () => {
  if (!account?.address || !amount || !recipientAddress) {
    setTxStatus("Please connect wallet and fill all fields");
    return;
  }
  try {
    const transaction = {
      data: {
        function: "0x1::primary_fungible_store::transfer",
        typeArguments: ["0x1::fungible_asset::Metadata"],
        functionArguments: [
          USDC_ADDRESS,
          recipientAddress,
          parseFloat(amount) * 1_000_000, // Adjust decimals based on your token
        ],
      },
    };
    const result = await signAndSubmitTransaction(transaction);
    await aptos.waitForTransaction({ transactionHash: result.hash });

    setTxStatus(`Transaction successful. Hash: ${result.hash}`);
  } catch (error) {
    console.error("Error:", error);
    setTxStatus(
      `Error: ${error instanceof Error ? error.message : "Unknown error"}`,
    );
  }
};
```

**e. Rendering the UI**

Render the main UI components, including input fields for amount and recipient
address, and a button to send tokens.

```javascript TypeScript theme={null}
  return (
    <main className="flex min-h-screen flex-col items-center justify-center p-24">
      <div className="z-10 w-full max-w-5xl items-center justify-between font-mono text-sm">
        <h1 className="text-4xl font-bold mb-8">Aptos USDC Sender (Testnet)</h1>
        <WalletSelector />
        {connected && account && (
          <p className="mt-4">Connected: {account.address}</p>
        )}
        <div className="mt-8">
          <input
            type="text"
            placeholder="Amount (in USDC)"
            value={amount}
            onChange={(e) => setAmount(e.target.value)}
            className="p-2 border rounded mr-2 text-black"
          />
          <input
            type="text"
            placeholder="Recipient Address"
            value={recipientAddress}
            onChange={(e) => setRecipientAddress(e.target.value)}
            className="p-2 border rounded mr-2 text-black"
          />
          <button
            onClick={handleSendTokens}
            disabled={!connected}
            className={`p-2 rounded ${
              connected && amount && recipientAddress
                ? 'bg-blue-200 text-black hover:bg-blue-300'
                : 'bg-gray-300 text-gray-500'
            } transition-colors duration-200`}
          >
            Send USDC
          </button>
        </div>
        {txStatus && <p className="mt-4">{txStatus}</p>}
      </div>
    </main>
  );
}
```

## Main Application Component

This component wraps the `HomeContent()` function with the necessary providers
for state management and wallet connection.

```javascript TypeScript theme={null}
export default function Home() {
  return (
    <AptosWalletAdapterProvider
      plugins={wallets}
      autoConnect={true}
      dappConfig={{ network: Network.TESTNET }}
      onError={(error) => {
        console.log("error", error);
      }}
    >
      <HomeContent />
    </AptosWalletAdapterProvider>
  );
}
```

6. Start the development server:

```shell Shell theme={null}
npm run dev
```

7. Open [http://localhost:3000](http://localhost:3000) in your browser.

## Connecting Your Wallet

* On the USDC Token Sender app, click the `Connect Wallet` button.
* Select your wallet from the list of available options.
* Approve the connection in your wallet extension.

## Performing a USDC Transfer

* Ensure you have USDC tokens in your wallet. You can get testnet tokens from
  Circle's [faucet](https://faucet.circle.com/) if needed.
* Click on `Request testnet Aptos Tokens` from your Aptos Wallet to source gas
  tokens.
* In the app, enter the amount of USDC you want to send and the recipient's
  address.
* Click the `Send Tokens` button.
* Your wallet will prompt you to approve the transaction. Review the details and
  confirm.
* Wait for the transaction to be processed. The app will display the transaction
  status.

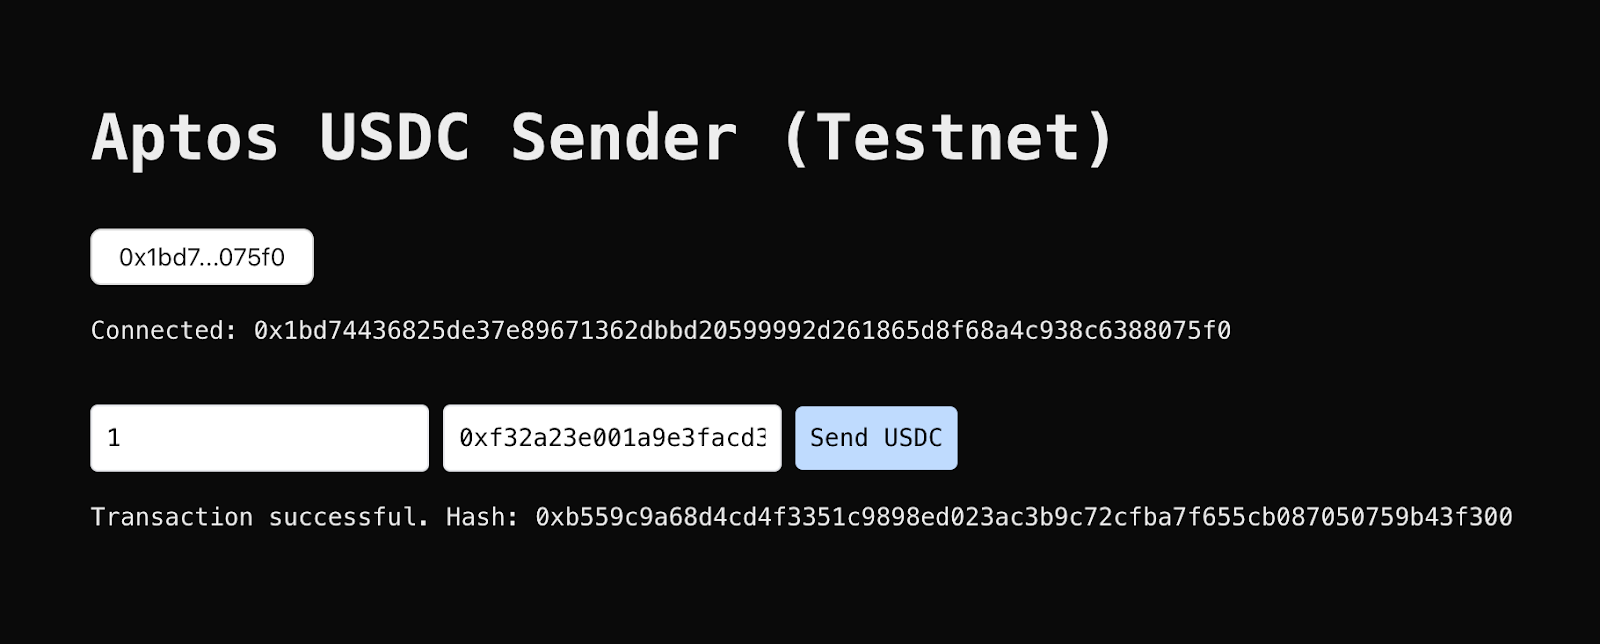
## Sample App UI

<Frame>
  <img src="https://mintcdn.com/circle-167b8d39/18D1O5_C359Zz2z5/stablecoins/images/qs-usdc-aptos-app-ui.png?fit=max&auto=format&n=18D1O5_C359Zz2z5&q=85&s=5bb170ff49dcfc6fa889d9b4b41d3a11" width="1600" height="644" data-path="stablecoins/images/qs-usdc-aptos-app-ui.png" />
</Frame>

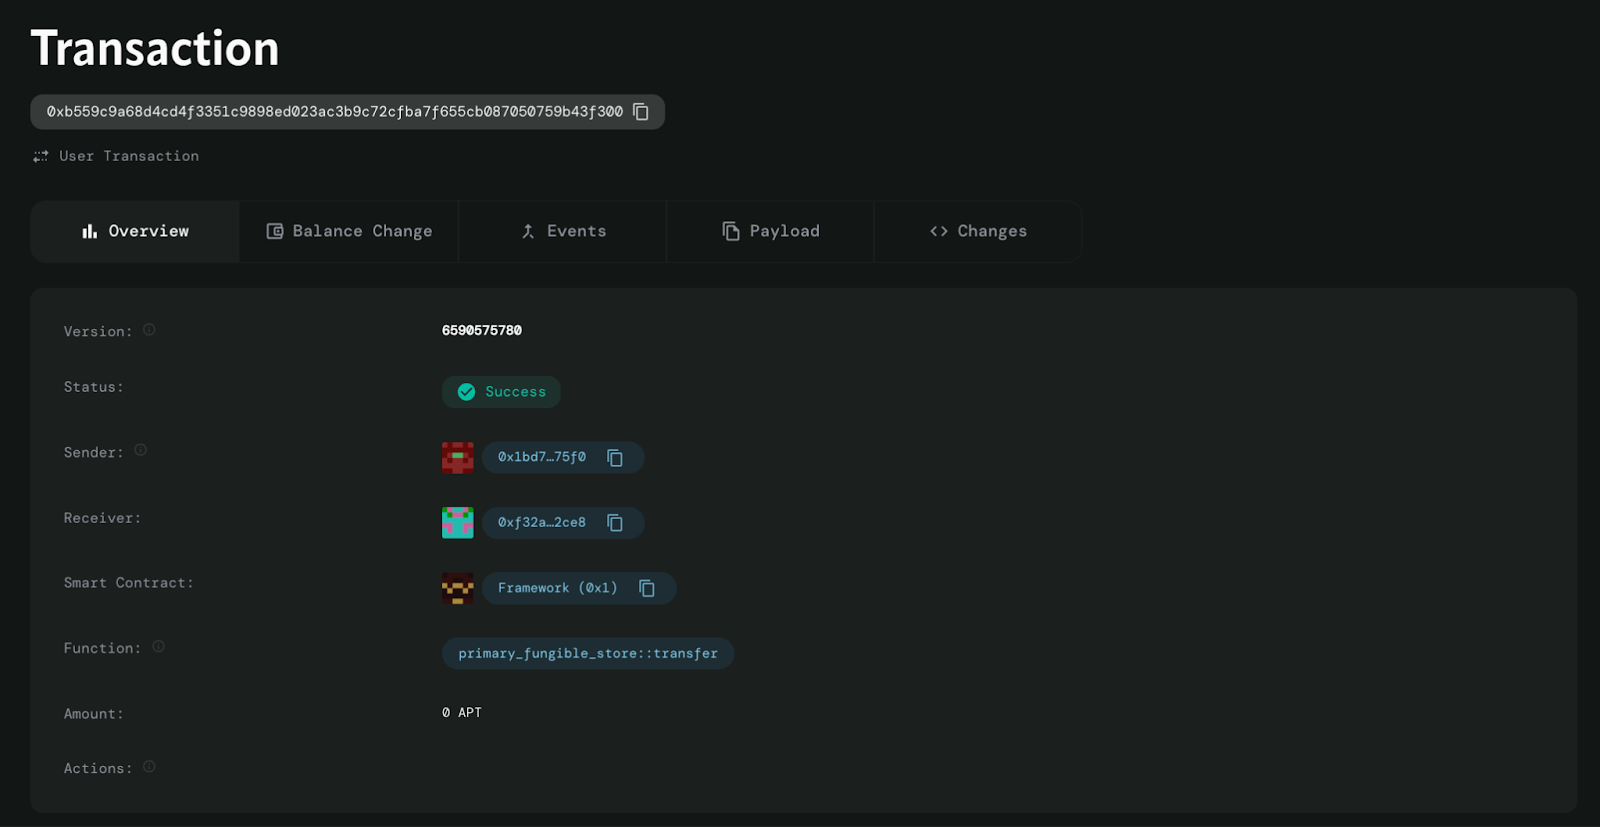
## Successful Transaction

You can use the
[Aptos Explorer](https://explorer.aptoslabs.com/txn/0xb559c9a68d4cd4f3351c9898ed023ac3b9c72cfba7f655cb087050759b43f300?network=testnet)
to check the status of the transaction.
<Frame>
  <img src="https://mintcdn.com/circle-167b8d39/18D1O5_C359Zz2z5/stablecoins/images/qs-usdc-aptos-app-tx.png?fit=max&auto=format&n=18D1O5_C359Zz2z5&q=85&s=4cded3204aed3d0cbe360e8bb9190788" width="1600" height="827" data-path="stablecoins/images/qs-usdc-aptos-app-tx.png" />
</Frame>