Method comparison
The following table compares each method on the criteria that matter most when picking:
For key management details, see Key management. For
how signing UIs work across methods, see
Confirmation UIs.
Social logins
Users sign in with Google, Facebook, or Apple. Circle handles the OAuth flow and creates a wallet for the authenticated user. Use when: You’re building a consumer-facing app and want users to onboard with accounts they already have. Best for low-friction sign-ups when crypto familiarity isn’t a prerequisite. Example use cases: Consumer apps using Google or Apple sign-in, fintech sign-ups tied to existing accounts, reward wallets attached to social identities. Tradeoffs:- Circle cannot recover lost provider credentials or unblock accounts. Users must go through the provider directly. For example, recovering a banned Facebook account can take weeks.
- Each social account links to one unique user ID. Signing up with multiple providers (for example, Google then Apple) creates separate user IDs.


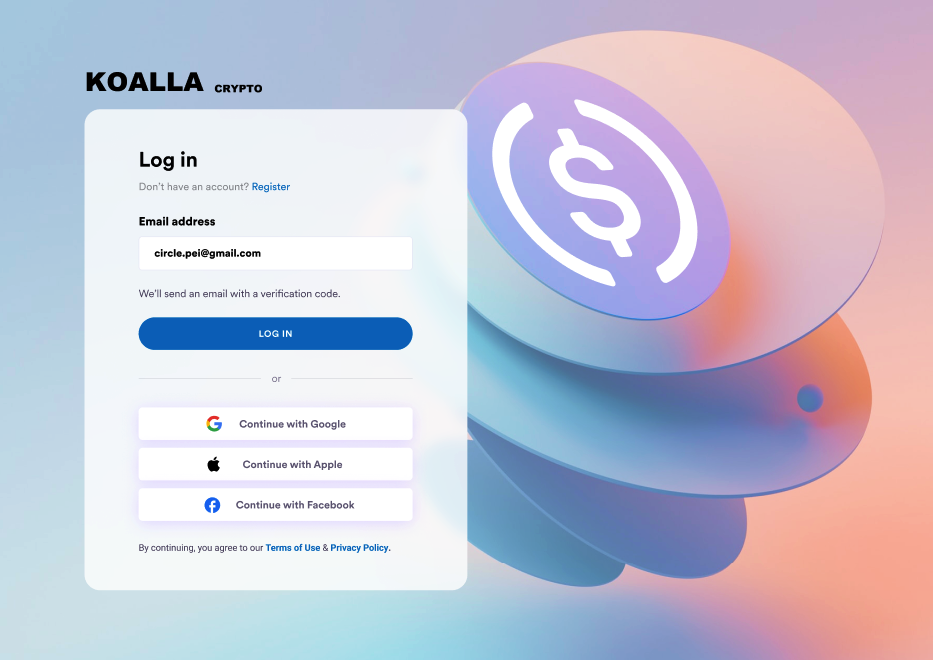
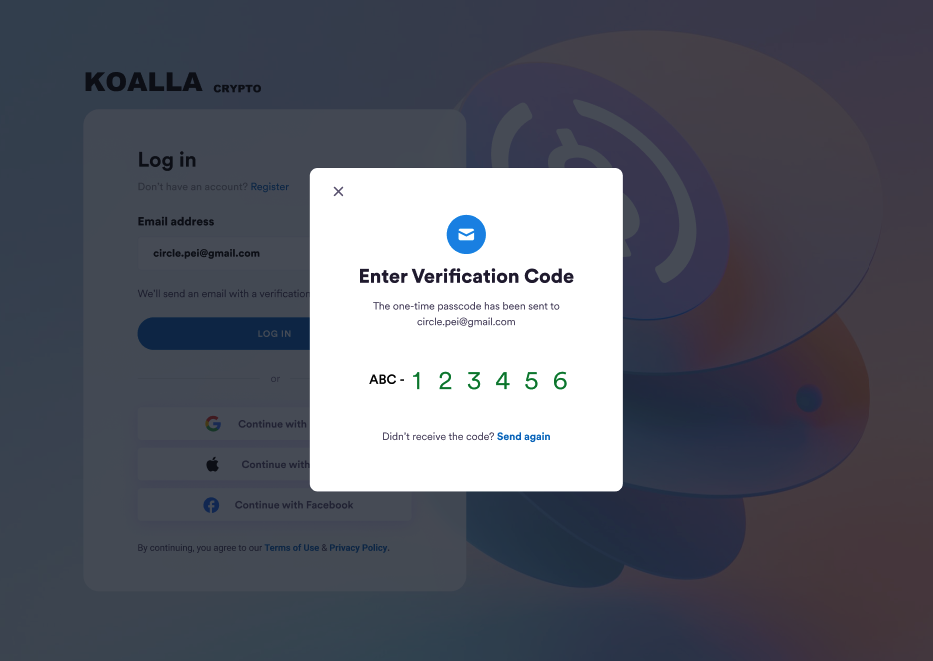
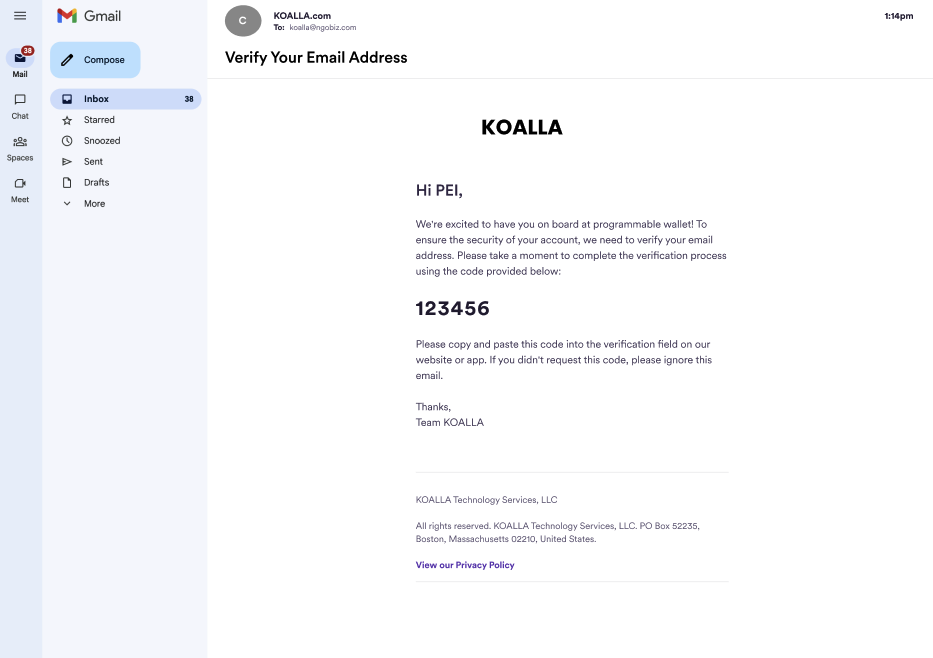
Email OTP
Users sign up with their email. Circle sends a one-time password (OTP) and creates a wallet after verification. Use when: You want a familiar email-based onboarding flow without a third-party authentication provider. Works well when users may not have social provider accounts or in regions where social login adoption is low. Example use cases: Apps with existing email-based user accounts, B2B-style flows, enterprise integrations. Tradeoffs:- Users need access to their email account to recover their wallet. Email account compromise means wallet compromise.
- Requires SMTP configuration through your own provider. Circle does not send the email.
Example: Email OTP UX
Example: Email OTP UX
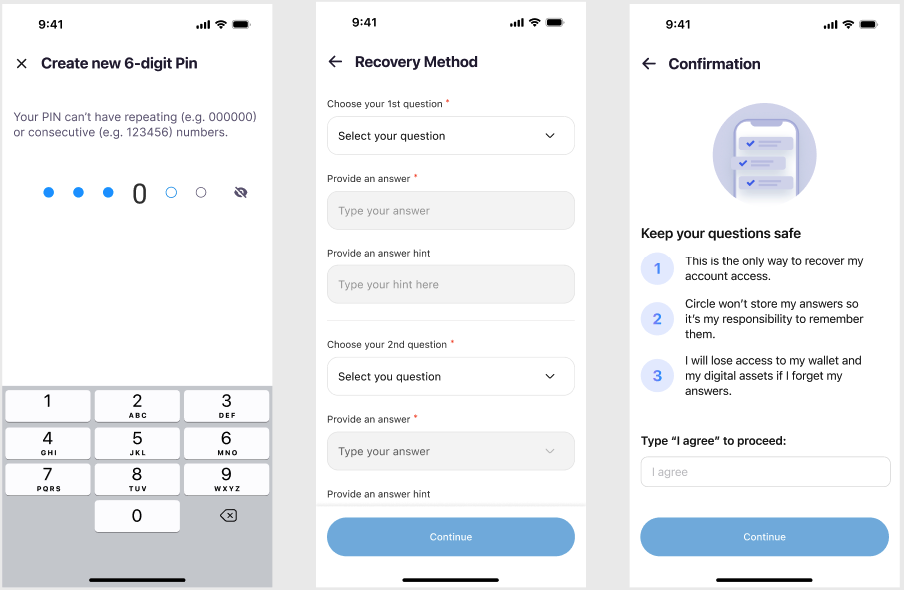
PIN
Users set a 6-digit PIN to authorize transactions. Optional biometrics let users sign with fingerprint or facial recognition on supported devices. Security-question answers, also set during sign-up, are the recovery path if the user forgets their PIN. The PIN is encrypted on the user’s device. After three incorrect PIN attempts, PIN entry locks for 30 minutes. After three incorrect security-question answers during recovery, recovery locks for 30 minutes. Use when: You want user-side custody. Only the user holds the PIN, and Circle has no way to recover it. Best for crypto-native users comfortable managing their own credentials. Example use cases: Self-custody-focused consumer apps, crypto-native communities, apps emphasizing user sovereignty. Tradeoffs:- Lost PIN combined with forgotten security answers means permanent loss of access. Users are responsible for remembering both.
- Higher friction than social logins or email OTP at sign-up.
- No third-party dependencies, no provider account to lose.
Example: Biometrics UX
Example: Biometrics UX

Example: PIN and security question setup
Example: PIN and security question setup
Session lifecycle
After a user authenticates with social logins or email OTP, Circle returns auserToken and a refreshToken. PIN users don’t receive session tokens. Their
PIN authorizes each action directly.
- The
userTokenis the session identifier. It expires 14 days after generation, after which users are logged out. - The
refreshTokenextends the session. Before theuserTokenexpires, send aPOSTrequest to/users/token/refreshwith the existing user token and its refresh token. The response returns a new user token.
userToken expires before being refreshed, the user is logged out and must
authenticate again to receive new tokens.